Star Watermark
Protect your photos and PDFs with easy watermarking on Mac and Windows
How to Watermark Photos on macOS with Star Watermark
Protecting your photos online is essential, and watermarking photos on Mac is a simple yet effective way to secure your digital assets. With Star Watermark for Mac, you can easily add text, images, or copyright symbols to your photos and even batch watermark photos in just a few steps. This guide provides a detailed tutorial on how to watermark photos using our free, lightweight software (only 1.7MB). Download Star Watermark for Mac now and start protecting your images!
Why Watermark Your Photos?
Watermarking adds a layer of protection by marking your photos with your brand, copyright, or logo, deterring unauthorized use. Whether you're a photographer, artist, or business owner, Star Watermark for Mac makes it easy to:
- Add text or copyright symbols (©) to claim ownership.
- Embed logos or images for branding.
- Batch watermark multiple photos to save time.
- Create professional watermarks with customizable fonts, colors, and positions.
Step-by-Step Guide to Watermark Photos on Mac
Step 1: Download and Install Star Watermark
Visit the Star Watermark download page to get the free version of Star Watermark for Mac. Install the software, which is lightweight and user-friendly, requiring no advanced technical skills.
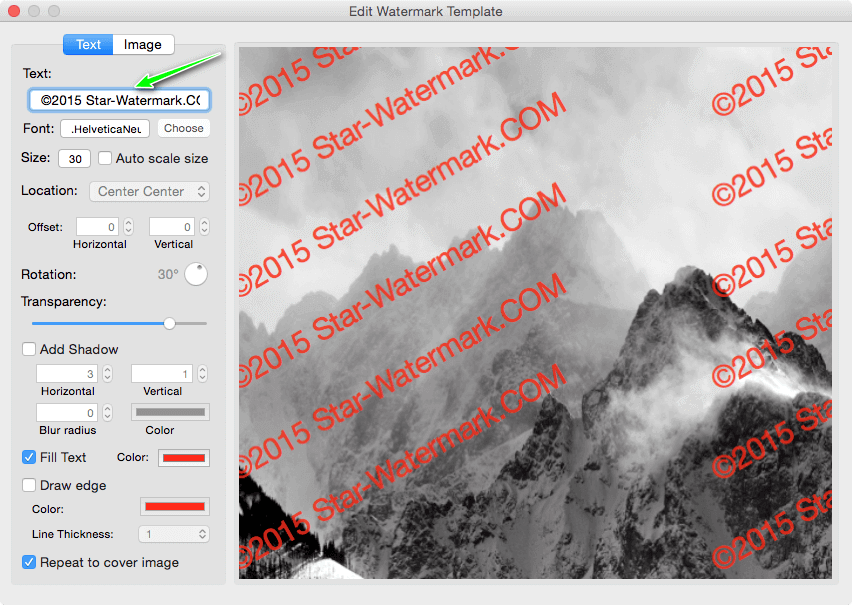
Step 2: Add a Text or Copyright Watermark
Open Star Watermark and create a new text watermark template:
- Enter your desired text (e.g., “Copyright © 2025 YourName”) in the text field.
- Choose a font, color, and size that suits your style.
- Position the watermark (e.g., center, bottom left) or rotate it for a custom look.
- Click “Add File” to select your photo, preview the watermark, and click “Processing” to apply it.
Step 3: Add an Image Watermark
To add a logo or image watermark:
- Create a new image watermark template and upload your logo or image.
- Adjust the position (e.g., top left, center), rotation, and transparency.
- Select your photo, preview the effect, and click “Processing” to apply the watermark.

Step 4: Batch Watermark Photos
Save time by watermarking multiple photos at once:
- Click “Add File” and select multiple photos (e.g., 10, 20, or 50 images).
- Apply your text or image watermark template.
- Preview the results and click “Processing” to watermark all photos in one go.

Tips for Effective Watermarking
- Keep it subtle: Use semi-transparent watermarks to avoid distracting from the photo.
- Consistency: Use the same watermark style across all photos for brand recognition.
- Test positions: Experiment with different placements to find the best look.
- Backup originals: Always keep a copy of your unwatermarked photos.
Frequently Asked Questions (FAQ)
- Is Star Watermark for Mac free?
- Yes, Star Watermark offers a free version with robust watermarking features. For advanced options, consider the Pro version.
- Can I watermark PDFs as well?
- Yes, try Star PDF Watermark for Mac for PDF watermarking.
- How do I register Star Watermark?
- Follow our registration guide for step-by-step instructions.
- Does Star Watermark support Windows?
- Yes, check out Star Watermark for Windows.
Get Started Today
Protect your photos with Star Watermark for Mac. Download now and start watermarking in minutes!
Need help? Visit our tutorials or contact support.