Star Watermark
Protect your photos and PDFs with easy watermarking on Mac and Windows
Tutorial: Watermark PDFs
How to Watermark PDFs with Star PDF Watermark for macOS
Follow this step-by-step guide to add text or image watermarks to your PDFs using Star PDF Watermark for macOS.
Steps to Watermark PDFs
- Launch the Program: Double-click the Star PDF Watermark icon to open the application.
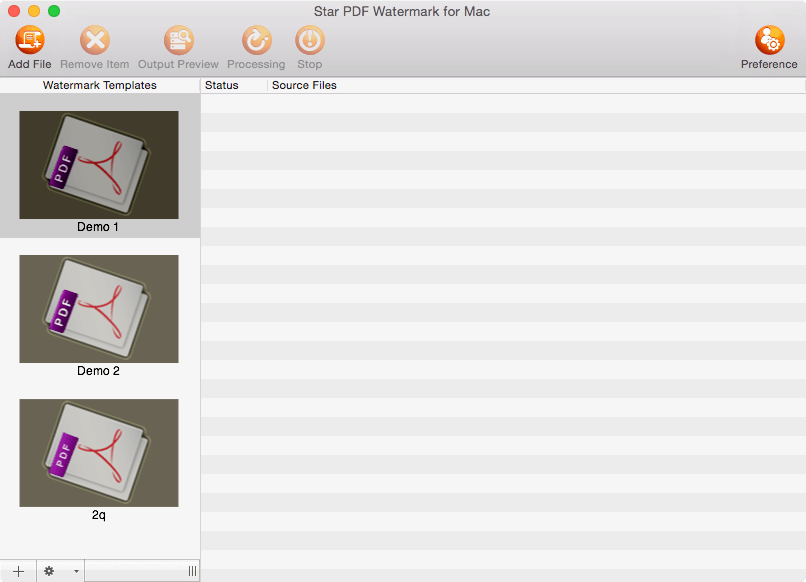
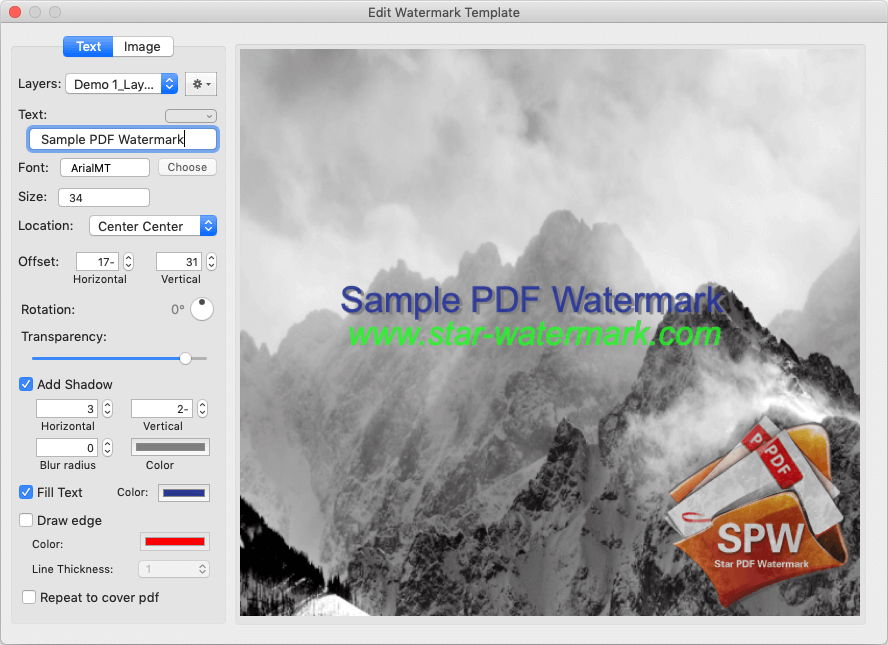
- Edit a Watermark Template: Double-click a template (e.g., "Demo 1") or click "Add Template" to open the "Edit Template" dialog. Customize text or image watermarks with options like size, color, position, or rotation.
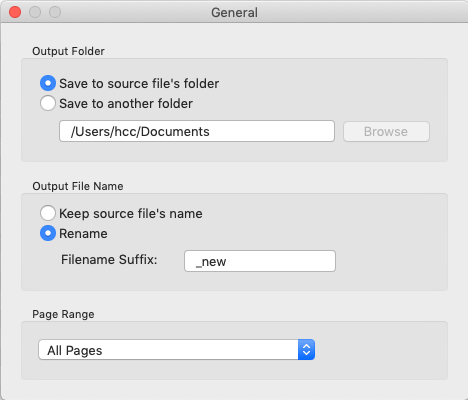
- Set Output Options: Click "Preferences" to configure the output directory, file suffix, and format.
- Add PDFs: Use the "Add Files" button or drag and drop PDFs into the interface.
- Preview Watermarks: Click "Output Preview" to check the watermark appearance.
- Apply Watermarks: Click "Start Processing" to watermark all PDFs.

- View Results: The output folder opens automatically, or check the "Preferences" to find the output directory.
Frequently Asked Questions (FAQ)
- Can I watermark multiple PDFs at once?
- Yes, the paid version supports full batch watermarking, while the free version has limited batch support.
- What types of watermarks are supported?
- Text watermarks in the free version; text and image watermarks in the paid version.
- Can I customize watermark appearance?
- Yes, adjust size, color, position, rotation, and more in the "Edit Template" dialog.
- Where can I get help?
- Contact [email protected] for support.
Explore More Tutorials
Get Started Now
Protect your PDFs with Star PDF Watermark for macOS.
Need help? Contact [email protected].